This article is general beauty information. GlowNourish may earn a small commission from some links, at no extra cost to you — see our Affiliate Disclosure.
There's something deeply satisfying about freshly done nails — and you don't need a salon (or salon prices) to get them. With a little technique, an at-home manicure can look just as polished, last just as long, and become a relaxing weekly ritual. The secret isn't expensive products; it's the prep and the technique. Here's exactly how to give yourself a perfect, salon-worthy manicure at home, step by step.
What you'll need
A simple at-home kit:
- Nail polish remover and cotton pads
- Nail clippers and a nail file
- A buffer
- Cuticle oil and a cuticle pusher
- A hydrating hand cream
- Base coat, your colour, and a top coat
- A small brush or cotton swab dipped in remover (for cleanup)
You don't need everything fancy — but a base coat and top coat are non-negotiable for a manicure that lasts.
Step-by-step at-home manicure
Step 1: Remove old polish
Wipe away any old polish completely with remover. Even if your nails are bare, a quick swipe removes oils so polish adheres better.
Step 2: Shape your nails
Clip to your desired length, then file in one direction (not back and forth, which causes splitting) to your chosen shape — square, round, or almond. Keep both hands even.
Step 3: Care for cuticles (don't cut them)
Soak nails in warm water for a few minutes, then apply cuticle oil and gently push back the cuticles with a pusher. Don't cut your cuticles — they protect against infection. Pushing back is enough to make nails look longer and neater.
Step 4: Buff and clean
Lightly buff the nail surface for smoothness (don't over-buff — it thins the nail). Then wipe each nail with remover one more time to remove all oil and dust, so polish grips properly.
Step 5: Base coat
Apply a thin base coat. This protects your natural nail from staining, smooths ridges, and helps colour last dramatically longer. Let it dry.
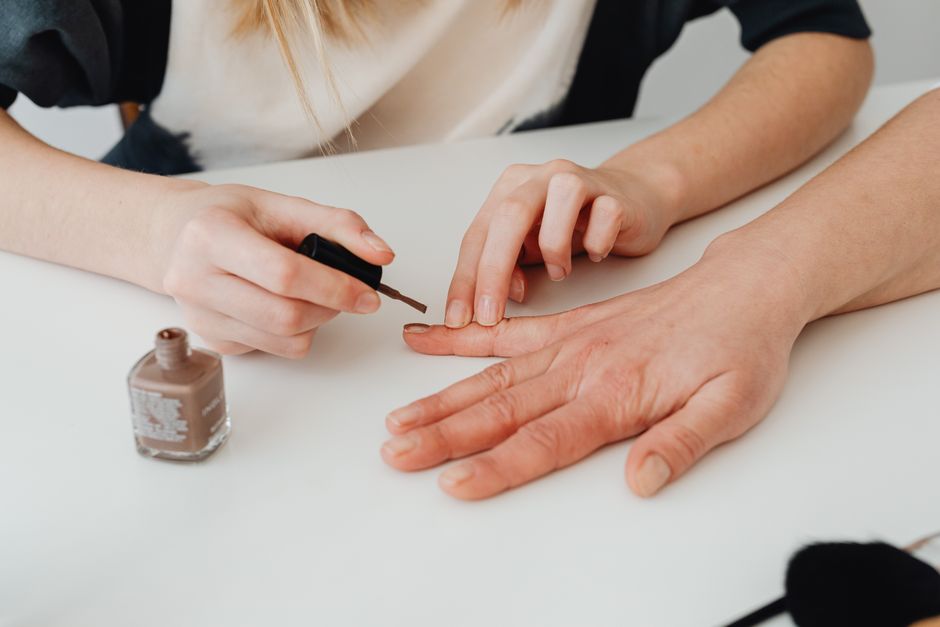
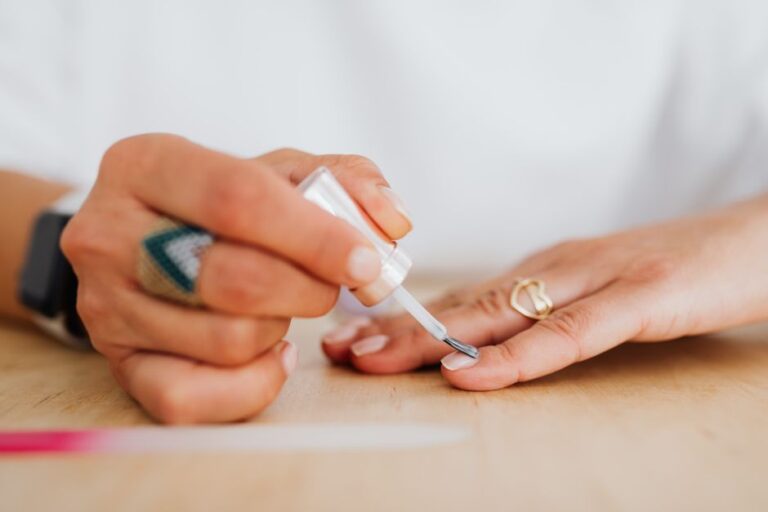
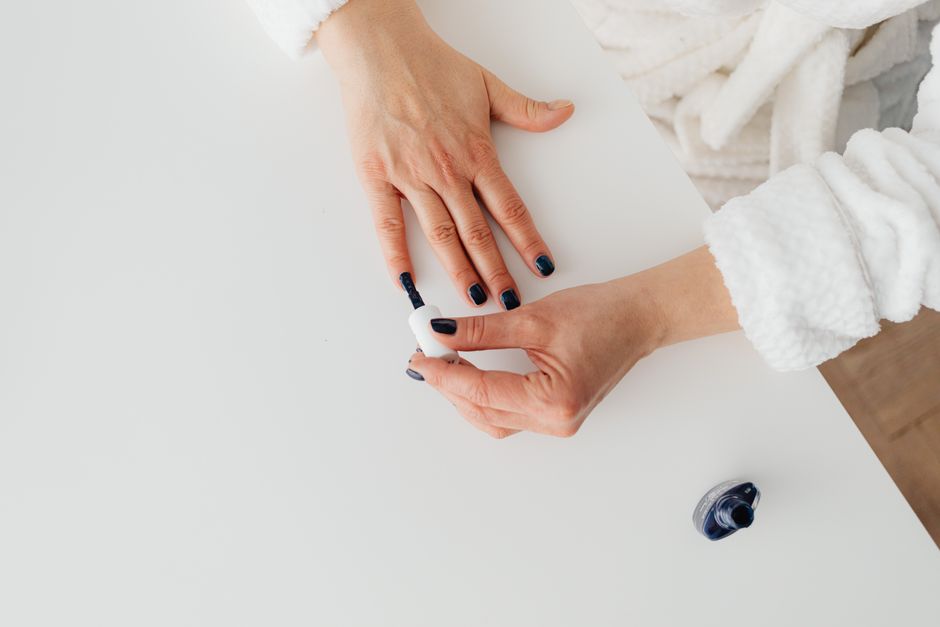
Step 6: Paint your colour (thin coats!)
The golden rule of polish: thin coats. Use the "three-stroke method" — one stroke down the middle, then one on each side. Two thin coats look smoother and last longer than one thick coat (which stays gooey and chips fast). Let each coat dry before the next.
Pro tip: leave a tiny gap at the cuticle and "cap" the free edge (swipe the brush along the tip of the nail) — this seals the colour and prevents early chipping.
Step 7: Top coat
Seal with a top coat for shine and protection. Cap the tips again. This is the step that gives that glossy, salon finish and adds days of wear.
Step 8: Clean up and moisturise
Dip a small brush or cotton swab in remover to tidy any polish on the skin around the nails. Once everything is fully dry, massage in cuticle oil and hand cream.
How to make your manicure last longer
- Always use base and top coat — the biggest factor in longevity.
- Apply thin coats and let each dry fully.
- Cap the free edge (the tip) with every layer.
- Re-apply top coat every 2–3 days to refresh shine and seal.
- Wear gloves for washing up and cleaning — water and chemicals are polish's enemies.
- Apply cuticle oil daily — hydrated nails are flexible and chip less.
Caring for healthy nails
Beautiful manicures start with healthy nails:
- Keep them hydrated with cuticle oil and hand cream — dry nails crack and peel.
- Don't use your nails as tools (opening cans, scratching labels).
- Give them an occasional break from polish if they're weak, and use a strengthener.
- Eat well and stay hydrated — nails reflect overall health, and biotin may help brittle nails.
- File in one direction to prevent splitting.
Frequently asked questions
Why does my polish chip so quickly?
Usually one of three reasons: no base/top coat, coats applied too thick, or oil left on the nail before painting. Clean, prep, thin coats, and cap the tips — and it'll last much longer.
Should I cut my cuticles?
No. Cuticles protect against infection. Push them back gently after softening with oil instead — it neatens the look without the risks.
How long should I wait between coats?
A couple of minutes until each coat is dry to the touch. Rushing is the main reason manicures stay gooey and dent.
How do I dry nails faster?
Thin coats dry fastest. A few minutes under cool air, or a dip in cold water after the top coat, helps set them. Quick-dry top coats are also worth it.
The bottom line
A perfect at-home manicure is all about prep and patience: shape and clean your nails, push back (don't cut) cuticles, and paint in thin coats with a base and top coat, capping the tips to seal. Tidy the edges, oil your cuticles, and protect your hands — and you'll have a glossy, long-lasting manicure that rivals the salon, for a fraction of the cost. Make it your weekly ritual.
Next: keep your whole look polished with our everyday natural makeup tutorial and treat your skin with DIY face masks for glowing skin.